

Below are details of what I've done in relation to the services in the camper,
ie water, gas and electrics, and audio-visual kit
GAS
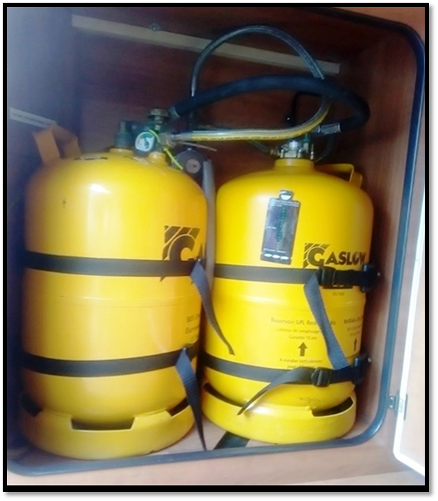
I had 2 x Gaslow 11kg refillable cylinders to fit into my camper (removed from previous one) but their intended location wasted space behind them so I moved the retraining straps further back and the space created at the front allows me to store other items in it too (disposable gas canisters etc).
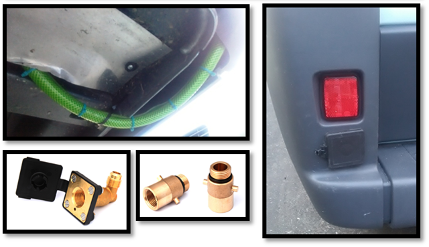
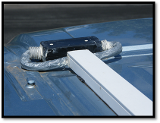
I fitted the pipework to the cylinders, fed the filler point pipe down through a bottom gas drop out vent, between it and the alloy protector plate to the rear (which I had to slightly bend to get the pipe past), then up behind the bumper. I used a smaller square filler point which has a 90 degree bend and pulled the pipe through the hole I'd made and connected it to the filler then pushed the pipe back through - this is much easier than trying to connect the pipe to the back of the filler once its been attached to the bumper (I did it the hard way on the last camper!). I protected the filler pipe with a piece of large bore water hose which I split lengthwise, placed over the pipe and secured with cable ties.
I used the smaller filler as it fits perfectly into the rear nearside corner bumper moulding (a strong area which can support the weight of the filler nozzle) with the various fill point adaptors being simply screwed into it (UK one shown). Once everything fitted and tightened up I checked carefully for leaks - none at all ... yippee!
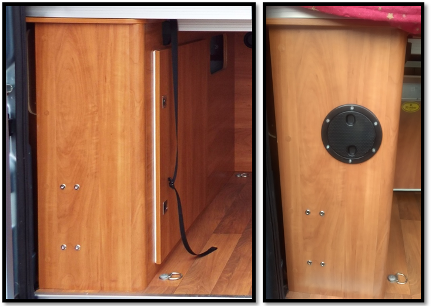
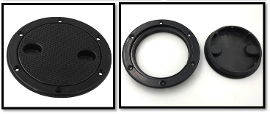
When I fitted the cylinders I ensured that the level gauges could be seen from the left side of the locker as I had already installed a round removable hatch on the side so that I can read and more importantly get my arm in to turn the cylinders on/off as required (eg when travelling) without the need to open the large locker door which would have entailed removing some of the items in the rear of the camper to gain access ... not ideal when it's raining!
SOLAR
I fitted two 100w semi-flexible solar panels linked to a Votronic Duo 250 solar regulator which is compatible with the Schaudt EBL 119 charge/control unit in my camper. I drilled a hole in the roof just behind the cab on the near side, then fed the cables through into the top of the overhead cab storage, then along horizontally and vertically into the 'B' pillar trim/covers to the bottom and across into the passenger seat base. The panels are stuck to the roof with suitable adhesive and the cabling enclosed in trunking and the ends sealed to make them watertight.
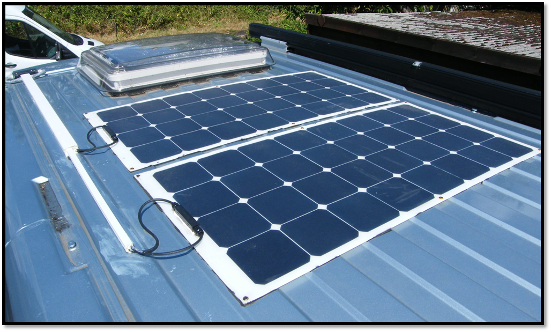
The black 'block' which the cables go into before entering the camper is from an old laptop charger mains cable which I had kept as I thought it would come in handy, which it did! The cables exit the trunking into tubing then into either end of the block which was stuck to the roof; everything has been sealed - the gaffer tape was holding it all in place whilst the sealant set but I left it rather than risk dislodging the sealant by pulling it off.
I put 10 amp fuses inline in each positive leads (shown bottom right of photo), then joined the leads together and secured them to the Duo positive input point, the negative leads were joined and secured into the negative input point.
I made up a lead to go from the Duo positive and negative output points to the EBL through which the leisure batteries receive their charge. The cab battery has a direct lead from the Duo with a 5 amp inline fuse.

AWNING LIGHT
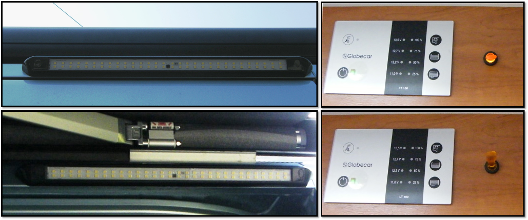
I fitted a black multi-led angled awning light above the side sliding door, I used quality double sided sticky tape (padded) to attach it rather than screw it on. To power it I fed the cable from the rear of the light through a small hole which I drilled into the area behind the control panel connecting it to a switch (which lights when 'on') located next to the control panel and then down to the main cab battery.
I had previously tried to link it into the over-hob light wiring but it didn't like although I suspect this was down to a faulty connector rather than the wiring) but I had already decided a direct feed was the best way to do it - it wasn't difficult: I fed the cable down the 'B' pillar by tucking it inside the vertical sliding door 'rubber' trim, then behind the lower trim panels, under the driver's seat, under the front floor covering (making a hole with a metal coat hanger through the 'foam' for the cable) and into the battery bay with a 5 amp fuse in the positive lead.
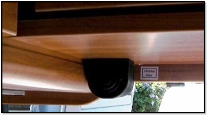
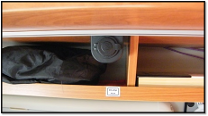
REAR VIEW CAMERA & MONITOR(S)
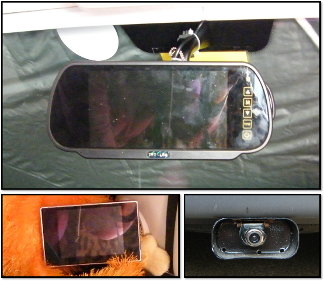
A camera was placed under the rear bumper with a protective cover then the cables fed underneath to the front and brought up via an existing hole under the driver's foot well cover. The cable was fed up under the side of the foot well, the wheel arch cover and under the dash to the small dash shelf. The cable for the monitor, which sits on top of the original rear-view mirror, was fed up along the top of the windscreen behind the cab roof covering, down inside the door rubber and connected to the other cables which have been hidden under the wheel arch cover. I also stuck a small spare monitor to the end of the dash which can be used if the 'mirror' one plays up by simply swapping the connectors round.
SOCKETS & LIGHTING
For some reason Globecars do NOT come with any additional 12v electric points other than those in the centre of the cab so I put some in, also some extra lighting:
Bed TV mount and sockets
The rear of the Campscout has 2 length-ways single beds which can be made into a massive kingsize. We sleep with our heads towards the front next to the fridge and washroom panels which provide 'headboards'. During the day it's an ideal place to relax, its so light and airy and especially lovely with the rear doors wide open. If we used the beds the opposite way as intended with heads against the rear doors we couldn't do this and would also squish the blinds with the pillows!
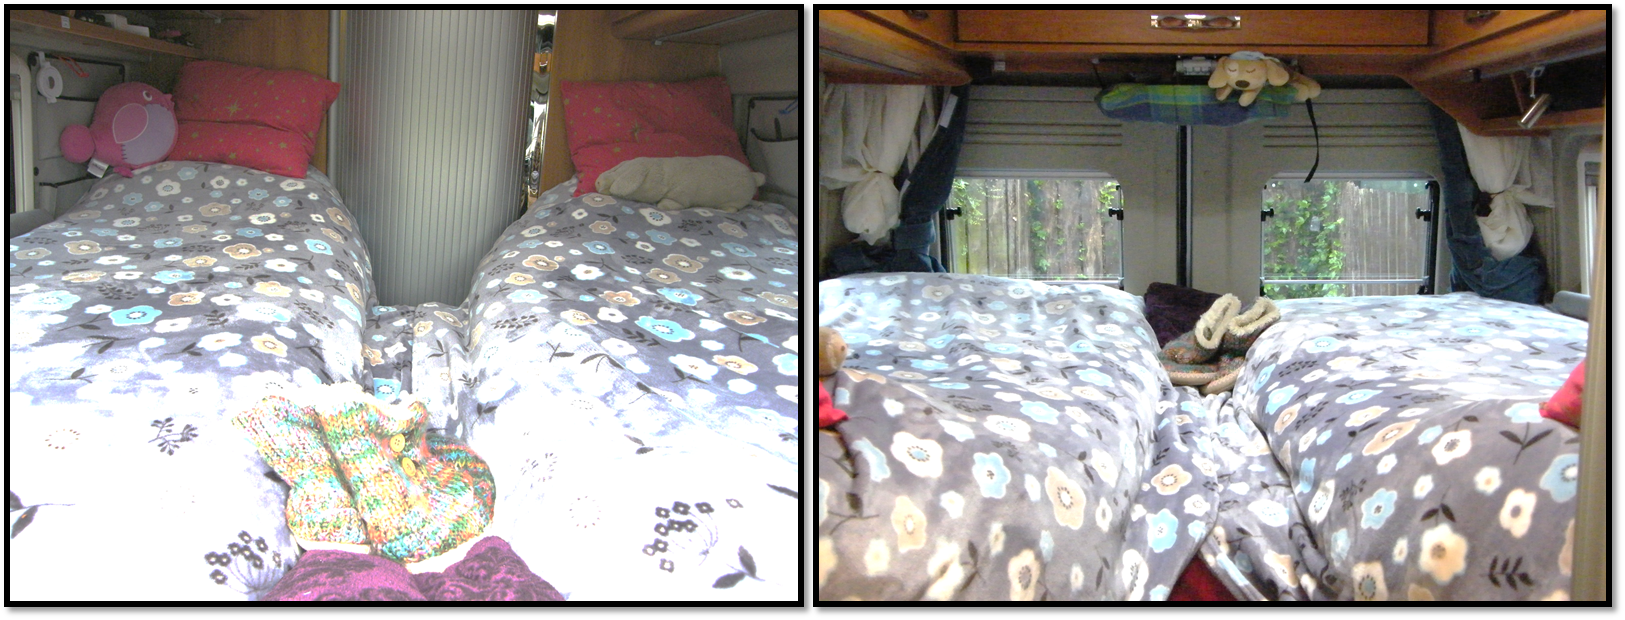
On an evening we like to slob out on the bed to watch a bit of TV so I mounted it centrally below the locker (in front of the rear doors) on a swing down bracket which, when not in use/for travel, is secured front to back with an elasticated strap that slips onto a hook behind the locker which holds it up whilst it fasten a webbing strap cross-ways to hold it securely.
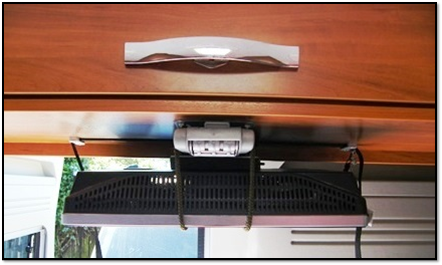
I installed a surface mounted 12v socket under the rearlocker to the left of the TV.
I also installed a 12v socket above the shelf over the nearside bed for charging phones, laptop, powering our PVR etc.
Over-bed light
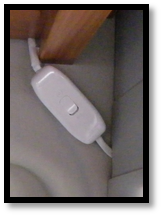
In the rear over the bed there wasn't a light, just the under locker reading lights, making it difficult to see what's in the lockers so I've stuck on a flexible LED strip light an in-line switch similar to the one I've used for the cab lights - you can just see it in the top left near to the locker door. I simply tapped into the existing 12vlighting cabling in the rear of the locker adjacent to the switch.
The lights work a treat and will make retrieving stuff from the lockers or off the bed much easier ... and especially for finding the elusive dog that's crept up there and is hiding!
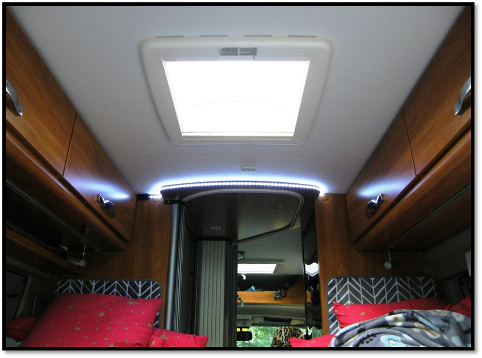
The 'chevron' panels are headboard pads made by cutting a large velour type bathmat in half, the idea being that they will protect the wall panels from being marked/rubbed and can be easily removed for washing as they are only held on with sticky Velcro which itself can be carefully removed completely from the panels in the future.
Lounge socket etc
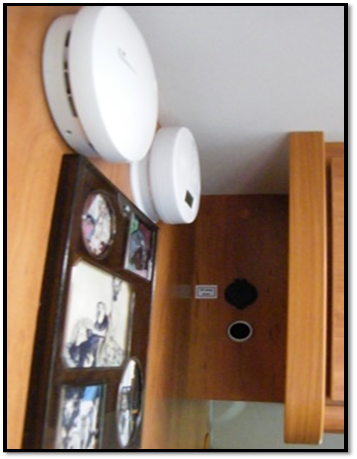
I fitted a flush 12v socket above the dinette seats in the space between the upper locker and washroom wall, the existing 'hole' below it is apparently for cables, tv aerial lead etc to be passed through if installed. On the left are the carbon monoxide and fire alarms.
I put a holder on the top of the dinette seat to safely place our table, phones etc for charging when needs be, this is fixed in place with Velcro.

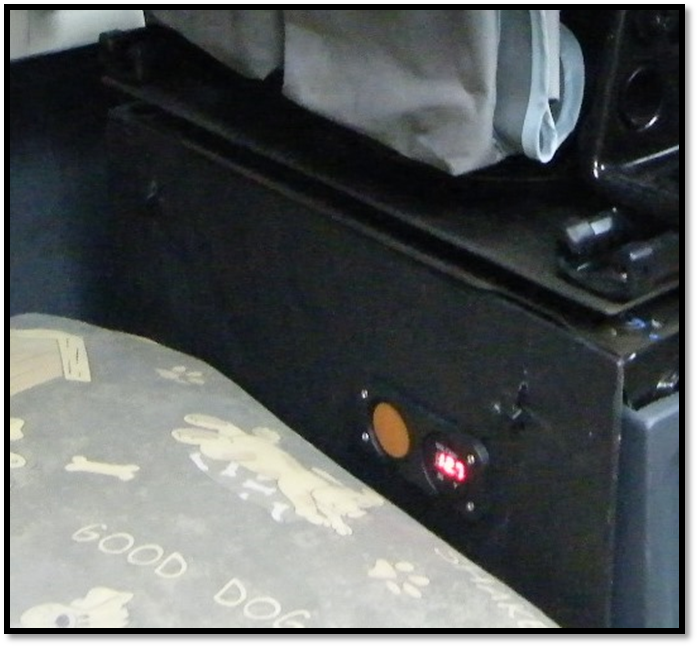
At the rear of the passenger seat I fitted a cab battery charge level display as there isn't a display for it on the control panel - the brown disc temporarily covers where there was once a 12v socket and will be replaced with another display for the leisure batteries in due course.
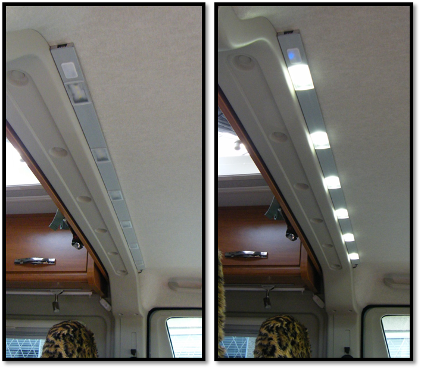
Cab lighting
I fitted a long LED strip light in the cab with a separate slider switch adjacent to the left of the overcab shelf. The cabling was fed into the plastic trim adjacent to the light, then across the 'B' pillar to the switch with the cabling then fed along the inside of the upper lockers to the junction box at the rear end of them and attached to spare connection points. The light is very bright and great for when sat in the cab seats reading etc.
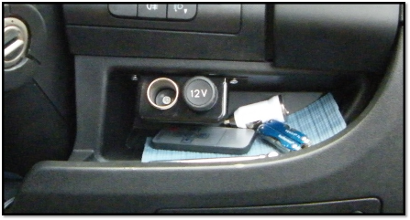
Cab Sockets
I put in a twin 12v socket above the small shelf on the right of the dash near the 'A' pillar which is connected directly to the cab battery with an inline fuse; this is to plug our rear view camera and monitor into and anything else we wish to power whilst travelling although they can also be used at any time as they are always powered. I did this rather than permanently connect the camera/monitor to the ignition as I didn't want to alter the existing base vehicle electrics for warranty purposes.
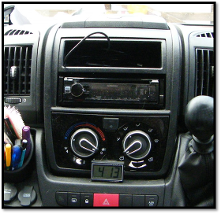
Radio
As we have an aftermarket radio fitted (not Fiat) due to the way it was connected we couldn't use it without the ignition turned on so I altered it by making up a 2 into 1 lead with an inline fuse and used this to connect the red and yellow leads on the rear of the radio to the yellow power lead only, leaving the red one unused - this means that the radio can be used without having to have the ignition turned on but we have set it to automatically turn off after 20 minutes on standby to prevent battery draw.
WATER
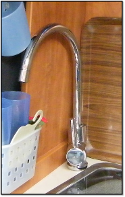
Kitchen Tap
I replaced the low tap with my own taller one - it is important to get the right type as there are those which work with a pressurised system and those that have a micro-switch which is what Globecars have. It may also be necessary to change the tails for the tap as I found they were different from the original one and also check the jubilee clips are still holding the pipe on correctly so it is watertight as they have a tendency to leak if disturbed!
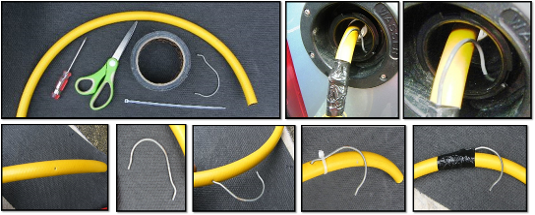
Hoses
I have two fresh water hoses, one long, one short, and use whichever is most suitable at the time, and can connect them both together if needs be. They are stored in the same bag which fits in a 'shelf' on the rear door. However they can get tangled up in the bag so I put an elastic loop on each of them so when wound the loop goes round the hoops and over the hose connector to keep it coiled. To make sure they are wound to the correct size for the bag I coiled them to the right size then put marks on them with permanent marker pen - now when coiling each hose I just line the marks up and know it's the right diameter - the shorter hose coils smaller and fits inside the larger one.
If filling up with water on your own trying to hold the hose in the fill point and turn on the tap can be difficult and you easily end up with an unintended shower, so I made a 'hook' which sits in the small indented channel in the filler which once on doesn't budge until I want it to. I removed the metal hanging hook off a metal/plastic clothes hanger for this purpose. In order to get the placement right I put the hose in the filler point, hooked the metal hook into the channel and then marked on the hose where the end sat, I then put a small hole in it using a screwdriver and pushed the 'straighter' end of the hose in, fastened it securely with a cable tie then taped round it - it sits securely in the filler point so I don't have to keep holding it!

Copyright: GlobecarCampscoutInfo (Mel Bucknell) 2018
Not to be reproduced without permission
Last updated: 27/7/18